Fix PlayStation 2 not reading discs
Open housing
To avoid short-circuiting, remove the power plug before you open the housing!
The PlayStation 2 (PS 2) uses an external power supply so it was not designed with concern for hazardous voltages inside the enclosure. However, to avoid short-circuiting, remove the power plug before you open the housing!
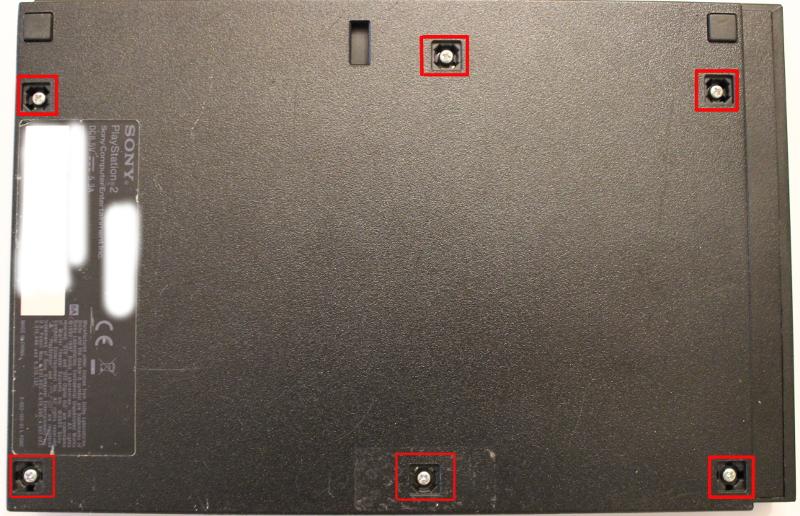
To open the housing, remove the five screw covers on the back of the PS 2. One of the screw covers is hidden behind the guarantee sticker. Please note that products with their warranty labels and barcodes removed or altered are not covered by the warranty any more.
The screws can be easily removed using a Phillips-tip screwdriver. After removal, use a special soft-plastic housing opening tool to lift the lid.
Clean-up
Clean housing
After removing the housing, use a slightly damp cloth to clean the inside of the PS 2.
Let the device dry for several hours in order to avoid a short-circuiting.
Clean laser lens
Never look into the lens!
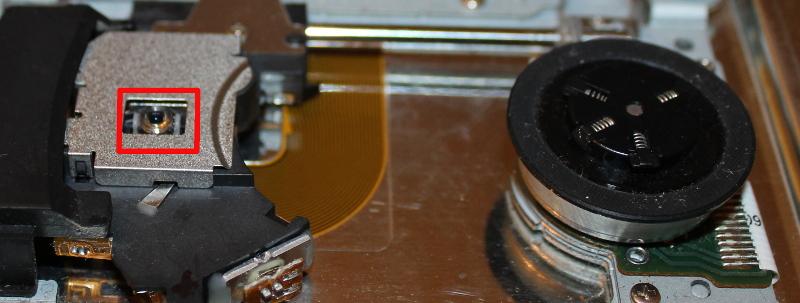
Avoid touching the lens or some of the fat from your fingers will stick on it. Use a clean cotton bud, dip it into denatured alcohol (methylated spirits) and gently clean the lens. It should appear completely clean.
Check DVD drive motors
Never look into the laser beam inside the PS 2!
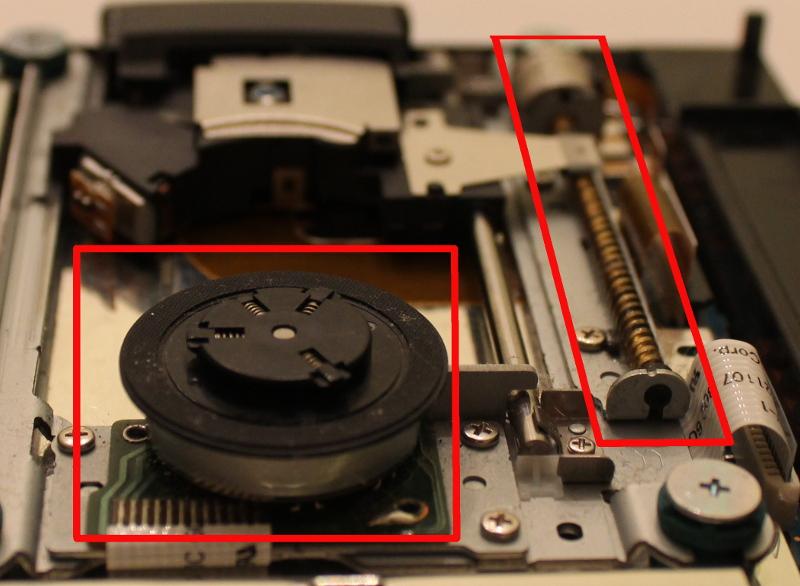
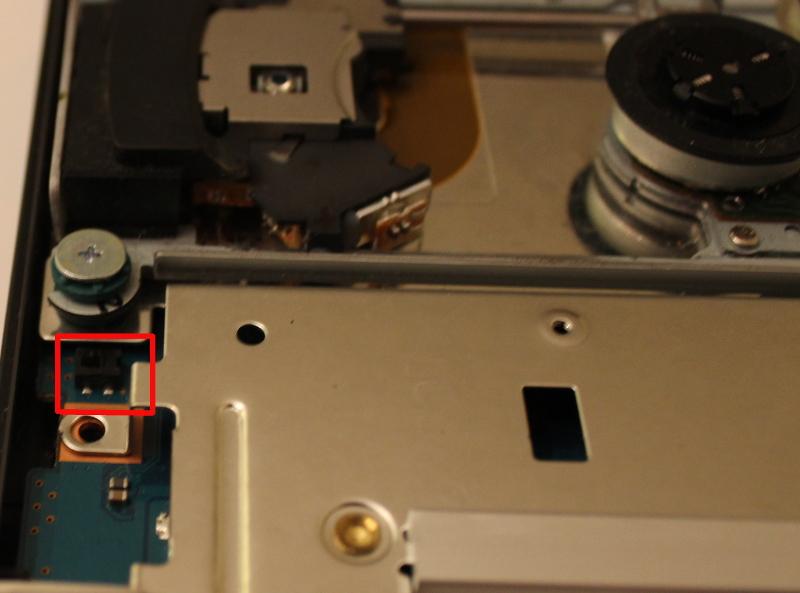
The DVD reader has two motors, one to spin the DVD (left rectangle) and one to move the laser unit (right rectangle) back and forth. Obviously, both motors have to work properly to guarantee an error-free operation of the DVD drive. A special safety mechanism avoids motor spinning while the cover is removed.
Put a DVD into the PS 2 (onto the spindle) and attach the power plug. Inserting a DVD has two advantages, the DVD will cover the laser and it will be easier to check if the DVD motor is spinning. The red LED should indicate that the PlayStation 2 is powered properly.
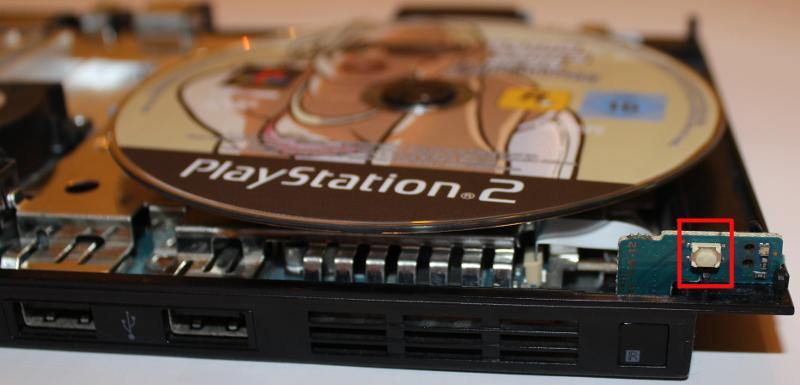
Push the power button (see picture on the right) to power up the PS 2. As usal, the green status LED should indicate the device start-up.
Notice the small black push-botton on the top of the power button PCB. It gets pushed when the DVD tray gets closed.
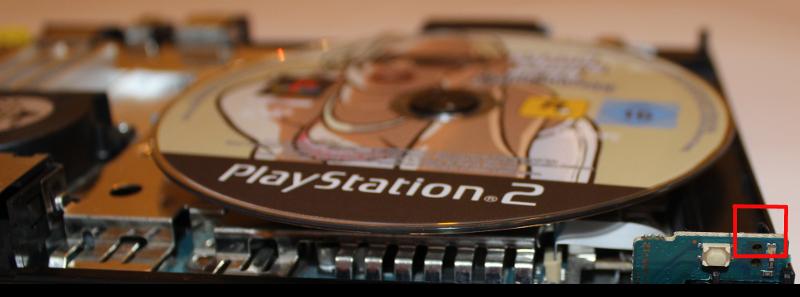
As noted before, a special safety mechanism avoids motor spinning while the cover is removed. The safety mechanism consists of two push-buttons, one on the top of the power button PCB (left picture) and one on the mainboard (right picture). Both buttons normaly get pushed when the DVD tray gets closes. To be able to check if the motors work properly, the buttons have to be pushed manually. Press and hold both buttons simultaneously. The DVD should start spinning and the optical unit containing the laser should start moving.
If both motors do not start to spin, remove the power plug and use the continuity test mode of your digital multimeter to check both switches. If both are working correctly, your housing might be the problem. Check if one of the plastic pins (pushing the buttons when you close the housing) is broken. If one of the pins is broken, you may want to either fix it (glue) or just short-circuit the corresponding push-button.